Its funny how inspiration hits you sometimes, I’m not 100% sure where this came from, it could be that I had such a great time making my recent Cambie dress and think it was a great success, it was probably seeing the great denim skirt that Kathryn @ YesILikeThat made and also wanting to try something new that made me produce this!

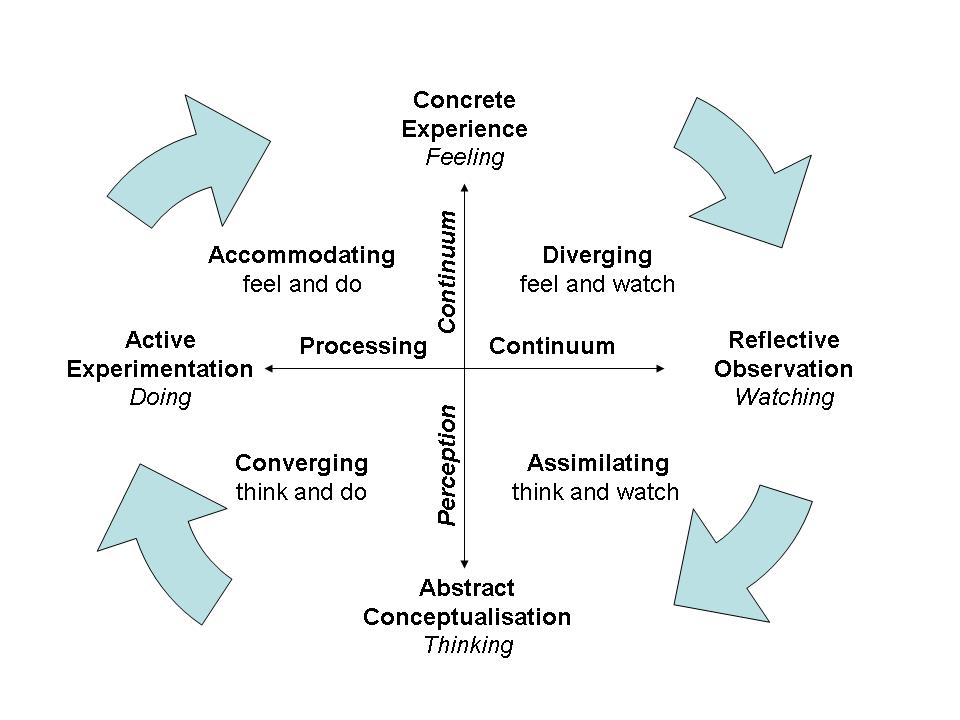
I decided I had to have would be quite partial to a great denim skirt, something that I could wear to death, boots and tights in winter, sneakers and ballet flats in summer. So I ordered some 8oz Washed Denim Dark Blue and gold denim topstitching thread from Minerva Crafts (which btw, I love, they are my go-to fabric shop atm) and then started thinking. You might have realised this by now dear reader I’m very much a procrastinator and like to ponder and think about things before I try them out (we were learning about different Learning Styles in college and discussing Kolbs Learning Model and I’m most defiantly a Reflective learner rather than a Active learner, the very thought of jumping in and trying something brand new without thinking and researching makes me break out into a cold sweat!). So I looked in books, I emailed Kathryn, I drew pictures and made notes and thought about it for a while. My original plan was to use the skirt block I made a couple of years ago from Cal Patch’s Design-It-Yourself Clothes book so I got that out and looked at the styles she described as I remembered she had a felled seamed skirt in there and realised I could use the skirt section from the Cambie Pattern as it had the basic shape I was looking for, it had pockets, even if they are straight slash pockets rather than the scoop-style pocket I was envisioning, I thought it would save a LOT of time.
One change I did make was to use lining fabric for the pocket bag, this meant cutting the pocket piece to have a 2” facing which then attached to the lining and was invisible from the outside. I also made the pocket 2.5” larger by cutting through the fold line and extending by measuring my hand on paper.

I used the pattern waistband except I cut it so that it was in three pieces and I could adjust the fit at the side seams (in the end I don’t think I did adjust it much). I used some fabric that’s been in my stash for a long time left over from another project for the waistband lining and interfaced it.

I sewed 2 lines of topstitching on the pocket edge to finish them off as well as giving them strength.

Instead of cutting the front of the skirt on the fold I cut two pieces so I could do a flat-felled seam using the gold topstitching thread and denim needle.

I sewed the side seams and the pockets together using regular thread and then serged the edges to stop fraying.

I attached the waistband and then thought some more about the centre back seam. I wanted a flat felled seam look with a zip inserted into the seam, originally I wanted a lapped zip but despite searching the WHOLE internet I couldn’t find any examples. Kathryn was kind enough to send me a photo of the back of her skirt which was really helpful. I then experimented with some scraps of denim and the zip to see how I could put the zip in, top stitch it and make it look like a felled seam.


In the end I sewed the seam with a regular seam using regular thread, basting the top zip section. I then pressed the seam open, trimmed the seam allowance down and folded over to make a faux-felled seam this meant cutting into the seam allowance just below the zip. I unpicked the basted section and adjusted the seam allowance to make a small lapped section. I topstitched the right line of thread first running all the way from the waist down to the hem on the left hand skirt piece, then I attached the zip to the right hand side.

Here you can see the zip pinned in place and the first line of the faux felled seam sewn. The zip was sewn in place on the right using regular thread and then the second line of topstitching was sewn to sew the zip in place and complete the faux felled seam.

I’m really quite pleased with the way it came out, I wouldn’t mind if the zip was lapped a little more but on the machine I was using that wasn’t much leeway as I would have liked with the zipper foot I had. My other machine has a better zipper foot so that might work better in future.

Inside view of the zip where you can see how I trimmed the seam allowance to allow a faux felled seam and zip insertion!

Here the completed zip + faux-felled centre back seam.
Once the zip was done the rest was easy! I used my chalk hem marker to mark the hem, basted that line, pressed it up to double check and then did a simple hem topstitched about 3/8” from the hem edge.

I stumbled upon this You tube video in my many hours of research on sewing hems and liked the tip mentioned at 4:08 about hemming over the felled seam and how to use something to support the foot over the contours. I didn’t have a nice tool so I improvised and used my point turner to prop the foot up and as you can see above it worked pretty nicely.

I hand-sewed the waistband down using a cross between blind hem stitch (I only took a couple of threads of the denim) and a ladder stitch (I sewed along the fold of the red lining fabric to pop out further along), I’m not sure what the technical name of the stitch is but it works and is invisible both sides!

I overlapped the waistband and sewed on a hook and catch thingy, I actually sewed this on 3 times as the first time it was the wrong way round and the second time there wasn’t enough tension between the two parts and it kept falling open!

Bad hand stitching but at least I matched the thread!

Inside views


bum shot!
I really enjoyed making this skirt, it was a real challenge and a personal design, I decided what I wanted and did it without worrying about going off-piste with the pattern, directions etc. At the end of the day its just a denim skirt but I feel its a well-executed denim skirt, which went together really well, I only unpicked 1 line of top-stitching and that was because it was too narrow rather than wonky! Just as well really as there's not a lot left, tip #562 buy 2 reels of topstitching thread if you feel it might not go well, there's not a lot of thread on them! The only other complication I had was that I kept changing thread and the stitch settings from regular to topstitch all the time depending on which seam I was sewing. As I mentioned I have 2 machines so in future I would thread them both one with regular and one with top stitch and switch back and forth. Did I say ‘In Future’? Yes I’m already thinking I want a khaki twill safari kinda skirt next, maybe not with the Cambie pattern though, I might go back to my drafted less-A-Line-than–a-Cambie-A-Line pattern and adjust from there. First of all I need to source some khaki twill, 10 points if anyone can suggest a good place to get some….