Saturday 31 December 2011

2011

Well its review of the year time……
I thought I would make a mosaic of the things I’ve made, and compare it with my plans for this year.  Dangerous really as it shows that I did some of it but not all of it!

(Edit – My mosaic went walkabout!)

The main thing I wanted to achieve in 2011 and failed was a better understanding of pattern drafting. I’ve come to the conclusions that I need to use commercial patterns more first to get a better grounding in how patterns work etc. 
I also failed to make lots of clothes for myself with only 1 skirt, 1 dress and 1 top!  How rubbish is that?  I DID make a dress for my MIL and a couple of things for Miss M but an epic fail for me.  Miss C also didn’t get a look in this last year, something she is very aware of so that needs to be rectified in 2012!   I also made a few things for the home this year as well, especially Christmas. 
I have a plan, I’m still fed up of always being badly dressed and have come to the conclusions that maybe dresses are my saviour.  In the summer months I wear RTW dresses 90% of the time but in the colder months its just jeans and t-shirts and not very flattering ones at that.  So I need more dresses. And I’m setting myself a challenge.  I plan to make 1 dress each month.  12 dresses in 2012! 

12in12challengebadgeI’ve even made a badge!
Now I know compared to Mena this is nothing as she makes a dress every week or even a 7 dresses in 7 days but there's no way I can achieve that so I’m committing to more than I currently achieve but within reason.
  • New Look 6802  I already have this one lined up although I’m wondering how the gathering will work on my tummy but well see what a muslin looks like. 
  • Simplicity 2406 which came with Sew Magazine recently,  I was thinking of View C as a wintery version and View D as a summer version.
  • Burda #101 I want to make another version of this but with a circle skirt rather than a rectangle
  • Burda #104 which I want to use a a base for a basic well fitted bodice that I can then adapt (boat neck, v-neck etc) and ambitiously draft a sleeve to fit the bodice!  
After that, who knows.  I don’t mind making multiple versions of the same dress, it doesn’t have to be a unique pattern each month.  I would like to rub-off a version of a RTW dress I wear all summer and there are loads of other patterns I’ve got stored in BurdaStyle favourites such as Coffee Date Dress or Danielle.

What about you, do you have 2012 sewing plans, will you give yourself a challenge like me?  Stevie has called them  Re-sewlutions which I think is a great name, do you have re-sewlutions?  What are you going to do better this year or what new skill are you going to pick up?
P.S. Its 2 years since I started this blog!  Can’t believe its gone so quickly and I can’t believe how rubbish I am at updating!  Next year will be different I promise!!!!!

Friday 23 December 2011

Frantic Christmas Crafting

Well the big day is nearly upon us, if I haven’t bought it we will do without, if I haven’t made it, well its too late now!  We’re all looking forward to a lovely family Christmas here with 7 of us this year, originally it was going to a quiet 5 and then a change of plans by my brother (was going to be Australia for Xmas and then decided he missed us too much and came back early!) and then Matts sister meant that we are up to 7, not as bad as the 10 we had last year!  So as its a ‘quieter’ Christmas I’ve been making….. again.  After making my Tree Quilt I decided that I NEEDED to make a felt gingerbread house I first saw 2 years ago! Never let it be said I’m one for procrastination!  In my defence its taken me ages to find thick (4mm) felt in the end I got it from Blooming Felt LAST December but it was a bit too late to do it then what with the 10 guests and all.  Anyway the girls made a cardboard gingerbread house the other day and it reminded me that I have everything I need so I got to work. 

DSCN8832

Ta Dah!

DSCN8835

Its cute isn’t it?  The gingerbread is maybe a little overcooked but it was the only brown available last year but I think it looks great.  The kids love it and Miss C helped to decide where to position everything.  I might go back and sew windows frames onto the side windows just to finish it off. 

The other thing I’ve been periodically working on is the Cross Stitch kit I bought back in February.

DSCN0083

and here's the finished article framed.

DSCN8838

Looks pretty good to me. 

With all these Christmas crafty things I’ve made and all the decorations I’ve been buying our house is looking a bit like Santa's Grotto.  I think we’re going to have to get  yet another box to store the stuff in the attic and Matt will be banning me from buying anything else soon!  So there ‘might’ not be any Christmas Craft stuff next year although I’m not promising anything.  I’ve made the couple of things that have been preying on my imagination  the last couple of years and nothing has caught my eye this year except maybe crochet snowflakes so hopefully there won’t be too much to do next year as invariably its late in the day when I get these urges and add into that both my girls have their birthdays in December and have full blown creative parties you can see why I’m kinda glad I’ve cleared my Christmas To-Do list.  I’ll post something about their parties in the New Year as I just don’t have time right now. 

OK presents wrapped check, turkey ordered check, Next Sale completed check (gotta love VIP online sales!), family en-route check, bring it on!


Have a great and safe Christmas and I’ll see you on the flipside!

Monday 12 December 2011

My First Ever quilt

Last Christmas (I gave you my heart…) I decided that the Christmas Tree needed a bit of jazzing up.  We have always used a large piece of green felt under the tree which looked ok when the presents were on there but afterwards looked a bit boring and makeshift (which it was!).  Due to Miss M’s late December birthday we don’t put any presents under the tree until a few days before Christmas so they are never there for very long and so the boring green felt was always there.  About Boxing Day last year I decided I would make a Tree Skirt and as there was bound to be Christmas fabric for on sale after Christmas I would get a head start on it in the New Year and not be making Christmas things in late November/December as I was last year.  Yeah right!  So fast forward to November 2011….  I’d been looking at tree skirts but realised where we put our tree and arrange the presents I didn’t want a skirt, more a rectangle so I decided to make a quilt!  I’ve always been scared of starting this as my main experience has been in dressmaking although I do read lots of quilty blogs.  I spent ages looking around at different ideas, I like the quilts usually classified as ‘Modern’ (even though I couldn’t define what that means) and eventually found this Moda quilt and used that as my inspiration.

(Source)

The biggest problem I found was working out the dimensions I needed, maths not being my strong point I had to try to explain to my husband how seam allowances work  and between us we kinda worked out the dimensions…. except we didn’t think about the footprint of our artificial tree!  I’d cut all the pieces, sewn the strips and pinned them together before we got the tree out and realised it was too narrow.  Therefore I had to extend the strips and after a lot of debate whether to match the strips or not I decided not to. 

DSCN8759

I cut the coloured pieces 3.5” wide and 11” long, the  white totalled 15” and so was cut into 10/5, 6/9, 7/8 inch lengths.  I made sure these lengths stayed together and then put the coloured sections in between using the ubiquitous 1/4” seam allowance.  This resulted in a width of 35” and a length of 60”.

The backing was plain white with the traditional patterned insert, which I had to do as there wasn’t quite enough white!

DSCN8763

Excuse the camera strap in shot!

The wadding was 100% cotton wadding and the only one my local quilting shop sells so I’m not sure if it was the best wadding or not.  As you can probably see I quilted it using the stitch-in-the-ditch method which sometimes was in the ditch and sometimes not!

DSCN8770

I bound it with 2.5” continuous binding which I sewed 1/4” from the quilt top and then hand sewed it using a ladder stitch which took forever.  I thought I would sit down and catch up with a TV drama so I put on the second series of The Killing having watched the American version of the first series unfortunately I forgot that this was the Danish version and had subtitles which makes stitching small ladder stitches AND reading a bit challenging and therefore slow progress.  Nevertheless I succeeded in sewing the binding and enjoying the TV programme!

blank

I added a label (which I’ve blanked my surname out) just so Miss M and Miss C can’t pass it off as their work in the future, Miss M has already said it will be a heirloom and passed through the family!

My thoughts on quilting: apart from the whole maths aspect, which is a bit mind blowing for me as this is most defiantly not my strength I found the whole process very therapeutic.  There's a beauty in repetitive tasks involved in quilting compared to dress making where every seam seems to be different and I have to keep referring to the instructions and have at many times sat there scratching  my head turning pattern pieces round in my hands trying to work out what the hell the instructions are trying to convey.  Whereas with quilting, as least with this one, the process was simple and repetitive, first sew the pieces to make strips, press the seams, sew the strips, press the seams, layer the quilt, pin the quilt, quilt the quilt, bind the quilt.  I quite enjoyed the process and not quite sure what I was so scared of beforehand so its given me the confidence to make one for myself.  Miss C is also eyeing one up as she kept using it as a blanket!

ActionShot

Here's an action shot!

Thursday 13 October 2011

Still here, still making just not blogging…

Yes, I am still here, making but not blogging.  When I first started this blog I would automatically blog everything crafty I have done but lately I forget to blog it so lets have a catch up. 

I’ve managed to make a couple of items for the kids as I had planned to.   I made both the girls a pink tartan skirt which went down really well  after they had  watched Barbie Princess Charm School as its just like Barbie's school uniform. 

DSCN8446

I used Liers tutorial for this skirt (I love her, she’s so cool!) and made 2 the same.  On Miss M’s skirt I unintentionally added in a bit of future-proofing as I made the waist a little too big so I fudged a fix to make the waist smaller by sewing the waistband together a couple of inches.  This can be unpicked when the waistband is a little snug for her.  I also left a HUGE hem on the bottom and hand sewed a blind hem to hold it nicely which can be easily left down when she grows.  Miss M has a pronounced belly so I used my drafting skills that I’ve picked up in various places to accommodate it so instead of dividing the waist into 2 for front and back I made the front a little bigger and the back smaller.  This means that the skirt sits properly on her waist rather than hanging down below her bulge as she normally wears skirts.  This prompted me to buy some (25m!) button hole elastic so that I can make some more skirts for them that will have adjustable waists and fit Miss M better!

I also made her a tunic/dress which she loves!  I used Simplicity 2689 for this and used a lovely dress-weight cotton we got from the local  fabric shop.  Now what you need to know about Miss M is  that she is obsessed with purple so she was immediately drawn to purple fabrics!  The one she chose for this reminds me of Liberty fabric but was a fraction of the cost!

DSCN8405

I did worry that it was a little too ‘old-lady’ for her but she was set on it.  Anyway I needn’t have worried as it looks great!

DSCN8394


This was view A dress with a very similar fabric to the pattern cover and can be worn as a dress but looks better with leggings. 

DSCN8412

DSCN8431

What do you think?  She loves it, we went out shopping wearing this outfit and she kept checking out her reflection in shop windows!  Its just right for her tween age, not too young, not too old but with an air of chic about it.  I’m thinking it might be great in a heavier wintery fabric like corduroy or wool mix what do you think? I’m pleased with my make of it, beautiful overlocked seams, perfect hems and matching seam even under the arm, I might be getting good at this sewing lark….

You can tell how much she likes this dress by the pictures we took

mosaic20433d3700b1ebb3b805116a2aef2ea85c14bf70

Next item to make is McCall's 6156 and I’ve got as far as tracing the pattern out to make view C as a dress.  She’s chosen an odd fabric for this so I’m not sure it will look as great as the one above but we’ll give it a go. 

I like these tunics that can be worn with leggings or tights on young kids, I think they look appropriate for tween age but allow the kids to feel grown up.  I really struggled to find patterns for this age group and everything is little girl pretty dresses so I’m pleased the Simplicity version looks so great.  Just need to get my butt in gear and make the next one…….

Wednesday 7 September 2011

Stretching things further

So as I said Miss M needs new clothes, she was wearing a dress the other day which has suddenly become very short on her!

DSCN8243

(I can see her knees!)

As the bodice is ok at the moment, although not for much longer, I decided to add to the length.  The fabric is a linen mix so I got some scarlet linen mix and added a ruffle. 

DSCN8241DSCN8267

(Before and After)

DSCN8273

(Very cute!)

DSCN8275

(Perfect for twirling)

What do you think?

Friday 2 September 2011

Autumn SWAP for kids

My girls need a autumn/winter wardrobe, especially Miss M, Miss C gets all the hand-me-downs so her wardrobe is stuffed.  I’ve been looking around for suitable patterns for a soon to be 9 year old but haven’t had much luck finding commercial patterns for that age group. She’s going on 9 and I find some of the clothes in the shops inappropriate for her age so I like to make things for her, but not enough!   So I’ve been collecting ideas from all the millions of blogs I follow and now I hope to devise a SWAP for the girls based mainly on skirt or dresses, t-shirts are the best things for kids and cheap enough and easy enough to come by not to bother sewing. 

  • I made her some skorts in the past which Miss M loves and she asked for some more, with winter coming I thought I would make them a bit longer to cover the legs.  Miss C wants some as well.  These will be made with pink jersey leggings and the assortment of floral fabrics I have in my stash.

(previous version which has been worn to death!)

  • I want to make Miss M some dresses that I’ve drafted myself, I intend to try our Lorraine's Drafting For Kids series and end up with a basic sloper that I can adjust to produce a variety of dresses (Hell I want to do that for myself as well!).  I kind of fancy a shirt dress for Miss M.  Source
  • a pleated skirt

Source

probably in a pink tartan I already have

  • If I’m feeling brave enough I might attempt a pair of trousers (eek!) although Miss M has a tummy bulge so I’m not sure of the best style to accommodate/flatter that.

The problem I have with lots of the inspiration I find is that it all seems great spring and summer ideas but not so much on the winter clothing.  The last two winters in the UK have been unusually harsh so I’m wondering if this winter will be the same and we need lots of cold weather clothes or whether we’ll have a mild wet one.

I think is time to take some measurements and get the ball rolling, the kids go back to school on Monday so I’ll have some time to get my head around the drafting and get something achieved! 

Monday 25 July 2011

Burda 101

So after fitting the bodice of Burda 101 I finished the dress. 
DSCN8147
I lined the bodice with white cotton lawn, the skirt is a simple gathered rectangle but I treated that as underlining rather than lining so the lining is sewn into the seams and hemmed rather than hang separately.  It was quite tricky to keep the lining and fashion fabric together even though it was basted in before sewing but the viscose fashion fabric is quite mobile so stretching is a bit of a problem.  I decided on the hem length and finished the hem before it was sewn to the bodice, its probably not the most professional way of doing it but I wouldn’t  have been able to do it in any better way.  I also added in a in-seam pocket which is the first time I’ve done one.  I used Lorraine’s tutorial as a guide, seriously if you want to know ANYTHING about pockets this is the place to go I didn’t realise there were so many different types of pocket in the world!  The pocket come out great apart from being slightly too small in the opening, when I drew around my hand I should have been more generous at the wrist area, the pocket is still functional but it would be better to be a little wider.  
DSCN8146
(excuse the odd facial expression – need lessons on better photo expressions!)
DSCN8153
After making this version I saw Katherine's version of the same dress except she put a circle skirt on the bottom and I think it looks much better for the reasons she stated ‘I had less bulk at the waist and more fullness at the hem.’  I felt like it was more a twirly dress than the fabric allowed and a little too bulky at the waist, so next time I make this (as I’m sure I will) I will try a circle or half circle skirt. 
DSCN8162
DSCN8149
(We’re all dressed up for my In-Laws Ruby Wedding Party, Miss M is wearing a dress I made for her last summer so there were 3 Me-Made dresses at this party!)
This was the party I made a dress for my Mother-In-Law for.  I was supposed to travel to their house (200+ miles) late on Friday night which would give me the Saturday morning to make some alterations if necessary but Miss C came down with a 24 hour bug, she had a headache all day Friday and then about an hour before we were due to leave she came down with a temperature of 101oC and had that glazed over look ill kids get.  Off she went to bed about 6.30 and I sat with her until she went to sleep but then she woke every hour for most of the evening.  I decided to give her some paracetamol to bring the temperature down (I’m never convinced whether to or not as you have a temperature to kill the virus/bacteria that has invaded you and taking paracatmol etc will bring that down and does that prolong the fight?!) and 10 minutes later she was sick so that didn’t help her all!  She was half awake and half asleep and almost hallucinating or talking in her sleep with lots of gibberish coming out!  Anyway Saturday morning she woke up and was loads better and after eating she was fine!  Its amazing how quickly children go downhill and then how quickly they come back up as you can see from her expression above 24 hours later!  So we went to my In-Laws Saturday and got there Saturday afternoon, therefore there wasn’t any opportunity to make any adjustments but if I had time, I would have tweaked the bodice a little:-
  • Take the back neckline in a little as there was a bit of gaping across the shoulders.
  • The front armscye needed a little trimming
  • The bodice could do with being a tiny bit more generous as its a little tight on her ribcage so the seams could be let out a little. 
DSCN8161
(I managed to get the crease out of the skirt front after following Rufus & Rachels advice)
DSCN8158
Everyone was very complementary about her dress both to her and to myself and I was relieved it fitted as well as it did.  I can still see what needs correcting but that's the problem with sewing your own clothes you just see the mistakes!    I think it looks good and I learnt a lot by fitting a dress on someone else's body, adapting those changes back to the pattern, using a fragile fabric as this silk frayed badly so it was all a success! 

Thursday 21 July 2011

Little Girls Winter Clothing

Yes yes I know its summer but unfortunately the weather in the UK doesn’t agree with me!  I was browsing in the fabric shop the other day (I only bought thread but I looked at EVERYTHING) and found some great needle cord that would look fabulous on my girls.  Its ages since I’ve made any clothes for Miss M & Miss C so I thought they would be perfect for autumn /winter clothes but then I was stuck. All the patterns/designs I see for kids are pretty summer dresses but I want pretty-but-functional autumn/winter dresses.  Only thing I can think of is a pinafore/jumper that can be layered with long-sleeved t-shirts and tights/leggings but there must be other possibilities. 

What have you seen around?  And who are good designers for kids (9 & 6) the Big 4 seem to be stuck in the 80’s and the summer so where should I be looking?  Help gratefully received!

Saturday 16 July 2011

BurdaStyle 101

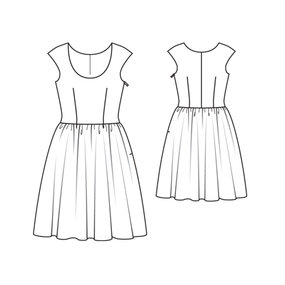
I’ve been fancying a couple of patterns on BurdaStyle specifically #101 and #104 but I decided to go for #101 as I intend to wear it to my in-laws 40th wedding anniversary party and I didn’t want it to look too similar to the silk dress I made for my MIL.  So I downloaded the pattern, although I didn’t realise it was just for the bodice and not the skirt.  Not that its too much of a issue as the skirt is just a gathered rectangle so it doesn’t exactly need a pattern. 

The largest size was just a little bit too small for me judging by the measurements so I traced it off and then added on a 1 inch seam allowance to accommodate the extra me!  I added this seam allowance on all pattern edges but it should have just been the side seams.  I made a muslin and then had a play with pins!

Here are some really bad photos please ignore any domestic chaos in the backgrounds…

DSCN8058

I let the side seams out slightly and played around with the darts quite a lot but ended up pretty much with the original darts just lowering the bust point a couple of inches to avoid the Madonna-Conical-Bra-look.  I needed to take the width across the chest in a little which you see with this tuck I’ve put in.  I had to do the same thing when I was fitting a muslin on  my MIL, I’m not sure what that indicates, is that the size is too large for the chest and that I should take a smaller size and then do a FBA?  Anyway to convert this back to a paper pattern I retraced the pattern and angled the edge of the first version so that a small amount was right of the edge of the paper (centre front fold) at the top and the rest was added in at the lower level by angling to the left.  I then smoothed out the neck curve so that it was horizontal at centre front.   (Does that make any sense and is it at all correct?!  It was more intuitive than based on experience or fact!)

DSCN8056

Here’s the original back, although the pattern said to have a centre back seam I decided I knew better and I would cut it on the fold.  This was a bad decision for a number reasons

  1. It increased the yardage of fabric as both bodice pieces would need to be cut on the fold rather than next to each other. 
  2. I reduced the number of possibilities to tweak the fit!

As you can see there is some bagging and puffiness to the back especially at the neckline.   Also remember this version has a 1” seam allowance all around including the neckline so that could have accounted for some of the flappiness there. 

So I traced the pattern again reflecting the changes I’d come up with so far

  • putting back the centre back seam
  • using a 5/8” seam allowance
  • adding some extra width the the bodice
  • marking the sewing line and clipping the curves

DSCN8065 

The front…..

DSCN8075

… and the back.  I’ve put the centre back seam in and I tried pinning a wedge at the neckline but there was still a lot of bagginess in the back.  So I took the back seam in about 1/4” all the way down. 

DSCN8082

At the moment this is just pinned so there are a number of creases and unevenness across the back but its miles better than before.  It doesn’t show up well on the pictures but there was also a puffiness on the shoulder blades.  I decided to trim the neck edge of the shoulder seam just a slither to pull it a little tighter as it was a little too high above the shoulder which then travelled down to the shoulder blade to give the puffiness.  Again it was intuitive as to the changes to make, not sure if they are correct or not!  It certainly looks better to my eyes. 

DSCN8087

Here's the final front.  I’m quite pleased with it now. 

I’m making it out of a viscose print which perfectly matches the colour of my raspberry sandals!  Its quite sheer so I’m going to line with with a white cotton lawn (which cost more than the viscose!).  I spent ages in the fabric shop today comparing different fabrics for their coverage and how they changed the flow and feel of the viscose.  There was a lovely brushed cotton/flannel that would feel cosy against the skin but as this is a summer dress I went for the cool crisp lawn instead.  

DSCN8062

Both fabrics have been washed and ironed and are now ready for cutting!  I’m going to use the lawn as a separate lining for the bodice but for the skirt I thought I would treat it more as underlining and sew it into the sides seam as one piece of fabric and at the hem.  I want to do this as I don’t like the feel of a lining skirt separate to the outer skirt, reminds me too much of  petticoats/slips that my mother made me wear as a kid!  Also I can’t get my head round how to insert an invisible zip in 2 layers of skirt and I might even add an in-seam pocket as well!

My intention is to get a good well fitted basic bodice which I can then play around with and change the necklines and even progress onto sleeves!  Watch this space…. 

Friday 15 July 2011

Simplicity 5961–Finished!!

So I finished the dress for my MIL!

DSCN8042

What do you think?  I’m really pleased with the construction as it probably the best finish I’ve done so far. 

DSCN8047

All the seams are either overlocked or bound inside bias binding so there are no raw edges.  I did consider lining the dress but as its dupioni silk it doesn’t need it from a see through point of view and I think the stiffness of the fabric works well with the pattern and lining might alter the flow of the garment. 


DSCN8050

I tacked the underarm seam allowance to the bias binding to hold it in place, I’ve still to tack the bodice/skirt seam to the darts and I want to put a hook and eye on the zip just in case. 

WP_000713

My only problem is that I can’t press out that crease down centre front of the skirt.  I daren’t use a hot iron and I can’t use steam or water to help it away so what would you recommend?  When I’ve been pressing I’ve been using a muslin pressing cloth (go on then actually its a clean tea towel!  Must start a collection of pressing cloths…) on the right side and straight onto the fabric on the reverse but I’ve only been using a warm iron.  Its been enough to get rid of lumps and bumps in the fabric but that crease is still there, actually it looks worse in that photo than it does in real life but it still bugs me so any advice gratefully received as ever. 

The 40th wedding anniversary party is next weekend so I’ll get some photos of MIL wearing the dress (if it fits!) and I’ll post them soon.  Now I have to make  matching tie from the leftover fabric using this tutorial and I’m going to make myself a dress as well!

Wednesday 13 July 2011

Simplicity 5961–Update

OK, so I fitted the dress on MIL so next thing was to cut the 50 year old silk (yikes!), so I laid all the fabric out and set about laying the pattern pieces…

DSCN8007

… took a deep breath and cut them out!  I didn’t want to use carbon paper or pens/pencils on the silk to transfer the pattern markings in case it permanently marked it so I used tailor tacks. 

DSCN8009

To sew the darts I used this method holding a thread at the dart point  to show a line to follow.  I found it really easy and much more accurate than any other method I’ve used in the past. 

DSCN8025

Here’s the bodice sewn up.  I’ve made a change from the original pattern to replace the armhole facing with bias binding to make what I feel is much neater more professional finish.  I sewed the binding on BEFORE sewing up the side seam.  Once the zip is in place then I’ll do the same on the neckline. 

DSCN8027

Here you can just make out the binding on the bottom left of the picture with the topstitching on the armhole. 

DSCN8037

Here’s the skirt with the side seams and half of the centre back seam prior to invisible zip being inserted.  I’ve finished all the exposed seams using the overlocker and the other seams will be sealed inside the binding, this silk frays like mad so this step is essential.   

Left to do

  • Sew bodice to skirt
  • Finish the bodice/skirt seam edges
  • Insert invisible zip
  • Sew bias binding finish to the neckline
  • Hem skirt with bias binding

Should be ok, I’ve also got to make a matching tie to make for FIL and I did want to make a dress for myself for the party but not sure if I’m going to have time now……